If you are looking for a simple, homemade white bread recipe that is soft, delicious, and easy to make, then you are in the right place.
Why I Started Baking My Own Bread
Last July we went on an Alaskan cruise (more about that in another post) and were gone a total of 10 days. A week or two prior to leaving we had purchased bread at the grocery store and since we are not really big bread eaters there was still at least half the loaf in the bread drawer when we left on our trip.
Don’t get me wrong. I LOVE bread. Especially hot bread. Biscuits, cornbread, yeast rolls, bread sticks… pretty much any bread fresh out of the oven is my kryptonite. Hot or not, a loaf of really fresh bread is amazing. But my A1C is higher than my doctor would like so I try to limit my consumption to special occasions. And no, meals on days ending in “y” do not constitute special occasions.
Anyway, we left on our trip and completely forgot to throw out the bread before leaving. Realizing what we’d done, or more accurately, what we had failed to do, I fully expected to find a plastic bag with a science project going on inside when we returned. Instead, what I found was bread which not only had no mold, but was still relatively fresh.
I was surprised but shouldn’t have been. Supermarket bread is, for the most part, full of all kinds of nasty stuff including preservatives that would have made the Pharaohs proud. I won’t bore you with the details. There are plenty of articles out there listing the bad things baked into our breads. Here’s one such article to start you on your way if you wish to go down that rabbit hole.
I say all of that to explain how I reached the decision to try baking my own bread. I love bread but wanted a healthier alternative. So I started doing some investigating. “Hey Google, show me a simple homemade bread recipe!” Another rabbit hole. There is an amazing array of different types of breads along with seemingly endless articles and recipes explaining how to make them. Approximately 164 million of them to be precise. Of course, every recipe is for “the best” bread ever made. lol I narrowed the search to recipes for bread machine breads (Who wants to do all that kneading? Not me!) Great! Now I was down to only 117 million recipes. White bread recipe? 105 million. Okay, I was just going to have to pick one, give it a try and keep trying recipes till I found one that worked for me.
The good news? Most of the recipes called for only 4-6 ingredients. Had to be healthier right?
Choosing the Right Bread Machine
I remembered that we had an old bread machine in the attic so I brought it down, cleaned it up, placed it on the island, plugged it in and, having still not decided on a recipe to try, took it for a test run with a bread recipe found on the flour bag. (Bread recipes are everywhere!!!) I loaded the pan with the ingredients, turned it on and sat down to watch TV and wait for my loaf of bread to materialize.
A few minutes into the process I heard a loud crash behind me!! Apparently, the kneading process had caused the bread machine to rock itself right off the island top and smash into pieces on the floor.
Well damn. “Hey Google! Show me some bread machines!”
After doing a little research, we decided on a Cuisinart Compact Bread Machine. It was reasonably priced, fit on the countertop, was a brand we recognized and respected, and it was an Amazon Best Seller. Gotta be good, right? It was! And still is. We’ve had it almost a year now, and we have never once regretted buying it. It’s easy to use, easy to clean, hasn’t tried to jump off and smash itself to pieces, and has worked as advertised without a hiccup.

Finding the Perfect Recipe
I was finally able to make a loaf of bread using the bread machine recipe on the flour bag. It was easy enough. Load the ingredients in the pan, set the correct program, turn it on and 3 hours later… hot bread. It tasted okay but it was a bit dense and definitely not the texture we were looking for.
The Cuisinart Bread Machine came with a bread machine recipe book so we tried several of those. It was fun but the bread didn’t turn out exactly the way we wanted. Good, but not not great.
Back to the interweb! I picked out a few white bread machine recipes I thought might work. One stuck out from the others because it suggested letting the warm water, yeast and sugar sit for a few minutes after mixing to allow the yeast to become active. (Recipe below).
But it still wasn’t quite what we were looking for. As with the previous recipes, it was easy. Just dump the ingredients in the bucket, put it in the machine and turn it on. Three hours later…. bread! Good bread but again… not great. The bread bakes in the machine and therefore comes out in the shape of the pan it bakes in. Sort of a cube. Slicing it proved to be challenging and it would go stale within 3-4 days if not eaten (Remember, we’re not big bread eaters).

I recalled that in studying the recipe book for the bread maker there was a setting that kneaded the dough to the point of it being ready to put in the oven but not baking it in the machine. So I bought a Farberware 9×5 non-stick loaf pan. (It is truly non-stick so no prep is needed before putting your dough in it.)
I put the ingredients in the bread machine, set it for dough only (Program #8 on my machine), waited for it to finish, dumped the dough in my bread pan and baked it in the oven for 20 minutes at 350 degrees.
The result was much better than the same recipe baked in the bread machine. Very soft and delicious but still not exactly what I was looking for. Then I remembered something that became a game changer.
The Modification to the Recipe That Changed Everything
It’s funny the things that stick with us throughout our lives. For example, 100 years ago, when I was in 2nd grade, (okay, maybe not 100 years, but a long time ago) we went on a field trip to Buttercrust Bakery in San Antonio, Tx where they made (and still make) Buttercrust Bread. It was fascinating watching the bread being made there, assembly line style. But the thing that stuck with me, oddly enough, was the memory of a machine that took two strands of dough and twisted them together like a peppermint stick before dropping the twisted dough into a pan to be baked. Hmmmm, I wonder…
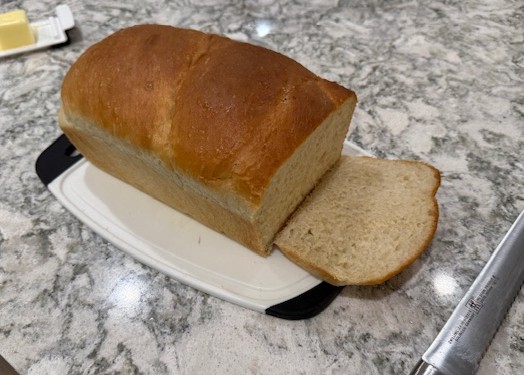
So i tried cutting the dough from the machine in half, stretching and rolling it into two more or less equal strands, twisting them together and dropping them in the pan. I put it in the oven and baked it at 350 deg for 20 minutes just like before and voila!! Amazingly soft, delicious bread. Easy to slice. Lasted a week (we ate it all before it went stale) and, as I said, it tasted delicious. The recipe was now perfect!
So that’s the story of Dave’s Extremely Soft White Bread (Bread Machine). And here’s how I did it.
First I started with this recipe from Food.com.
Step-by-Step Recipe
And here is that recipe with my modifications.
Directions
- Put warm water (105 – 115 degrees), yeast and sugar in your bread machine. I use an instant read digital thermometer similar to this to instantly and accurately measure the temperature of the water. Too hot and you will kill the yeast.
- Let it stand 6-12 minutes depending on the temp of your water. This will activate the yeast. It will foam.
- Add the remaining ingredients in the order listed.
- Use the “Dough” setting on your bread machine. It will knead it the necessary number of times and allow the dough to rise.
- When finished, (my bread machine beeps when finished) dump the dough out onto a surface lightly dusted with flour. It will deflate. Don’t worry. This is expected.
- Knead the dough a little and form it into a ball. The dough will be sticky so rub a little flour on your hands to keep the dough from sticking to your fingers.
- Using a dough knife cut the dough ball in half
- Stretch and roll each half into a rope slightly longer than the length of your bread pan.
- Twist the two strands of dough together and place in the bread pan. There will be space left on both sides and probably at the ends. That’s okay. It will fill in as it rises.
- Cover the pan with a clean dish towel and set aside to let it rise. The amount of time it needs to rise varies with room temperature, how active your yeast is, etc. Typically, mine takes 30-45 minutes. While you’re waiting, pre-heat your oven to 350 degrees.
- When the bread is finished rising place it carefully in the oven (you don’t want it to fall) and bake for 20-25 minutes depending on how done you want your crust to be. 20 minutes works well for me. It comes out a light golden brown.
- Remove from the oven and let it cool for 5-10 minutes in the pan. I like to brush the top with butter at this point but that’s completely optional.
- Turn it out onto a cooling rack and allow the bread to finish cooling before placing it in a storage container. (after you’ve cut those first few slices to enjoy while it’s hot, of course) Gallon ziplock bags work fine but I like to use this bread keeper.
- Enjoy your bread.
Ingredients
- 1 cup warm water (105-115 degrees)
- 2 teaspoons yeast
- 3 tablespoons sugar
- 1/4 cup olive oil
- 1 teaspoon salt
- 3 cups white all purpose flour
Do you have a favorite bread recipe? A recipe you’ve perfected? I’d love to hear about it. Be sure to try this one and let me know how it works for you.